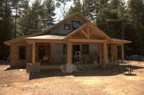
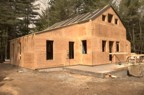
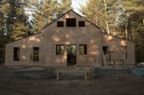
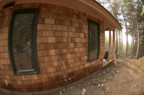
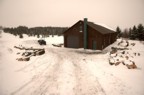
The Hut (map)

Back porch, no roof, floor, or framing

Back porch timbers and ceiling (2x6 T&G white cedar)

Back porch floor, made from 2x4 T&G white cedar harvested in Pompey

Framing on the bay window

framing on the bay window, looking into the beginnings of the chimney

Framing on bay window as it interfaces with the timber frame

Bay window area with the windows installed

Bay window area with scaffolding

Framing on the interior of the bedroom

Ceiling of the first floor is finished with maple harvested from our home in Pompey

First floor with completed chimney and Lucie on the mezzanine

Front door is finally installed with the Emtek latch kit

The emtek front door latch

The siding begins to creep around the house and onto the porch

Another shot of the front porch; the large crate left of the door is the boiler

The Hut enclosed in plywood; the building finally begins to take form

The Hut enclosed in plywood, seen from the front

Jack tries a mockup of the stairs that Steve built

Jim standing on the back porch before the floor was installed

We set up a temporary camp in the meadow dubbed "Mosquito Camp" for obvious reasons

The Hut is stained dark brown (as required by our APA permit)

The large boulders are to receive the porch posts

One of the boulders that will act as a support for a porch post

The timber frame of the roof system

Two types of siding are used -- red cedar shingles and red cedar clapboard

View of the dix range from the bay window

Looking out the bay window from within the great room

Looking at the bay window area from the second floor prior to the chimney

Looking into the bedroom from the outside

The completed drainage system for the outdoor shower

Head on view of the Hut; the trim and flooring are stored under blue tarps on the porch

Another view of the Hut from the side

The first snow on the Hut

Air intake of the chimney

Wood support for the fireplace opening archway

The arch of the fireplace opening, with the wood support in place

Stonework on the left side of the fireplace arch

Keystone in the fireplace arch

Fireplace arch with firebrick in the back

Completed fireplace opening; Mark in the background

Completed fireplace opening; Mark and Lucie in the background

Chimney with scaffolding, just before breaking through the roof

Chimney with scaffolding, just before breaking through the roof

Chimney from the mezzanine with the fan airspace and wood stove flue

Completed chimney

Another shot of the completed chimney

Another shot of the completed chimney

Chimney from the mezzanine with the temporary ridge pole support still in place

Chimney from the mezzanine with the fan airspace and wood stove flue

Closeup of the rocks in the chimney at the mezzanine level

Stones gathered from the property for the chimney

More stones gathered from the property for the chimney

Staging area for stones gathered from the property for the chimney

Closeup of a few stones

Staging area for the chimney stones as seen from the roof

Exterior scaffolding for building the chimney above the roof

Closeup of the stonework around the cubby in the kitchen

Closeup of the stonework below the hearth

Chimney in the kitchen galley

Chimney at about the 6' level

Stonework around the cubby in the kitchen

Stonework around the air intake

Stonework around the wood storage cubby

Stonework around the air intake and wood storage cubby

Closeup of embedded river stones

Another closeup of embedded river stones

Stonework on the left side of the wood storage cubby

Stonework on the right side of the wood storage cubby

Carefully fit stones in the chimney

Stonework in the kitchen galley near the floor

Taking a rest after collecting chimney stones from the property

Metal air intake vents in the fireplace box

Fireplace box from above

The timber frame is supported at 5 positions by the chinney. To do so, the chimney had to be built around the free-floating members, then the temporary supports removed.

The hole has been cut into the ceiling to allow for the chimney

Jim and Jack load equipment onto the flatbed for transport to the Hut; this equipment was used to collect stones for the chimney from the property

Mark cleans out the joints between the stones

Mark's diamond saw

Mark grinds the edge off a stone to achieve a proper fit

Mark begins the chimney

Round stones from the Boquet gathered for use in the chimney

The collection of round stones gathered from the river for use in the chimney

The crew that did the initial gathering of stones for the chimney

Staging area for the chimney stones

Bales of cellulose await loading into the hopper

The bay window with all the surrounding maple paneling completed

The bedroom has two closets, each paneled with maple. We used the maple with the most defects for this job.

The completed paneling in the bedroom

Another view of the completed paneling in the bedroom

The cherry paneling had to be scribed where it met with the maple ceiling, since the maple ceiling was warped and cupped due to moisture damage

A view of the bedroom closet with the new canister lights installed on the ceiling above

The first flooring was laid near the chimney in the kitchen

Leslie inspects the hickory flooring

New canister lights in the great room

New canister lights in the bedroom

The toilet closet was paneled with cherry scraps down low and maple up higher

The cherry paneling in the bedroom was scribed around each oak rafter

Up close and personel with the cherry paneling in the bedroom

The completed insulation job in the bathroom. Cellulose was blown into the various cavities in the exterior wall.

Careful work by Skip the electrician

The first window extension jamb and sill installation in the bathroom

Another window with a completed extension jamb

The extension jamb on the triangular window

The hickory floor was carefully scribed around the stonework of the chimney

The chumney hearth showing the careful scribe work on the flooring

Closeup of the floor around the hearth

I installed cherry flooring on the ceiling above the bedroom closet; this flooring was extra from our house construction 15 years ago

More flooring around the side of the chimney

More flooring around the side of the chimney

More flooring around the side of the chimney

Side of the great room from the loft

The great room and chimney with the scaffolding

Green board installed in the shower

The interior bedroom wall was insulated, both for sound proofing and to shut off part of the house in the winter

Johnny finishes the final corner of flooring in the bedroom

Katey helps break up the cellulose bales as they enter the hopper

The bathroom wall prominently displays a natural knot in the maple

The maple flooring in the loft, partially completed

Lucie sands the front door; for some reason, the door was delivered with black mold on the lower half

The paneling (maple) and trip (cedar) in the dressing room, all from scraps left over from our basement project

The wall paneling was carefully installed around the braces of the frame

Paneling in the bathroom, partially complete

Paneling in the hallway and utility area

Completed paneling in the bathroom, wide angle view

Paneling in-progress in the great room

Paneling in-progress in the great room

Paneling in the loft just after it was completed

Paneling in the loft just after it was completed

The panels in the peak of the roof needed to be assembled in advance, then slide up behind the post-and-beam structure using a sledge hammer

Schelly emerges from the Hut just after a session with the insulation blower

Schelly cuts flooring on the chop saw

A nasty job, Schelly blows insulation into the bathroom wall

The bedroom before the closet was paneled

The wood stove prior to installation

The wood stove with its first fire

The wood stove and pipe, just after installation

Fisheye view of the toilet closet

The first window to be completed with its trim, in this case, walnut wood

Fisheye view of the bedroom and closets

Fisheye view of the bedroom, ready for the floor sander

Fisheye view of the bedroom, ready for the floor sander

Great room cleared of tools and ready for the floor sander

Great room cleared of tools and ready for the floor sander

The great room with the doors stacked against the wall

Looking at the bay window from the loft

Bathroom hallway

The chimney and gear room

Countertop made of Adirondack granite (in the Cold Springs Granite showroom)

An outdoor shower is installed on the west side of the Hut, providing us early access to water

The outdoor shower is made of rough copper piping, well suited to the look-and-feel of the Hut

Pressure tank in the utility room

A temporary toilet is installed for the crew

There is a dug well with a concrete top. This has since been raised another 4 feet.

In the spring, there was 9' of water in the well

A model of the underfloor heating system used under the wood floor

The floor of the outdoor shower is a pit, lined with plastic and filled with river stones

The outdoor shower is drained to the hillside using PVC pipe left over from the septic installation

The floor of the outdoor shower is drained via PVC pipe to the hillside

The drain pipe is covered with mesh to prevent animals from taking up shop

Plumbing a la Mike Morris and Sons

Bob on the roof, preparing it for the roof panels

A large crew is required to lift the 10" stress skin panels onto the roof

The roof is finally installed -- 24 guage standing seam, double lock, Hartford green

The new roof

The new roof from the northwest with cutouts for the kitchen exhaust, boiler, and septic vent

The pile of 10" stress skin for use on the roof

Adam trims the "Adirondack Palm Tree"

Adam saws off his lanyard (not)

Large bucket on the excavator

Forms for the footer

South side of the foundation -- forms for the footer

Excavation crew dumping sand, then moving it into the foundation

Sheehan's excavator with its enormous bucket

Back filling the foundation with sand

Back filling the foundation with sand

Foundation as seen from the front of the hut as the excavation crew pack sand into the interior

View of the foundation from the west. The large concrete box in the center is the foundation for the chimney; the smaller free-standing piers are for posts in the timber frame.

Jim digs the trench for the phone cable on a hot, sweaty day

Jim measures the Hut site

Jim chips branches cleared from the view

John consults with the representative from the power company

The new driveway; the box on the right is the transformer

The excavation crew packs the sand with a tamping machine

A man from the power company repairs the transformer

The building site for the Hut before any work

Crane at the site before the raising

Looking south from the virgin site; stakes and ropes mark the locations of the building

The site layout occurred when the site was still snow covered; a sled was used to transport equipment to the site

The beginning of work on the concrete footers

Overview of the hole before the foundation

Another overview of the hole before the foundation

The view from the bay window

Mark and his brother Phil cement the floor stones into position

The stone floor is laid out dry; the joints between the floor stones are filled with small river pebbles

The stone floor after everything has been leveled and cemented into place; several of the pebble fillers are done as well

The completed stone floor before the sealer is applied

The stone floor after sealing: one of the pebble sections

The stone floor as seen from the bathroom door

Another pebble section in the floor; the pebbles were collected by hand from the Boquet River

Several more pebble sections in the stone floor

Pebble sections in the stone floor

The finished (and sealed) stone floor

The finished (and sealed) stone floor as seen from the bathroom door

The stone flooring, still in its palletes

Jim holds the temporary brace as the others lower the ridge pole into position

Steve's timber framing shop

Closeup of timbers on the back porch

Bag of webbing uses by the Amstutz crew in assembling the frame

The bottom of the posts are sealed before placing them on the metal brackets

Up close and personal with the braces

Bucket of dowels used hold the joints together

Calvin prepares a mortise in the shop

Calvin drills a hole for a dowel

Calvin uses giant orange hammer to wack something into place

Calvin working in the shop on the timbers

Carpenter butt

Clamping the floor section to the door section

Mike climbs the door section

Colin pushes scaffolding onto the second floor

Colin messing around with the giant hammer, Kevin in the background

Comealongs used to hold up sections of the frame during the raising

Another comealong

Nifty joinery in the timber frame

More cool joinery in the timber frame

Cool spline holds together a complex joint in the timber frame

Boom of the crane during the raising

Crane hook flies through the air

Hook of the crane

Crane moves a load of timbers off the delivery truck

Calvin cuts a dowel to make room for the ridge pole

Dennis can't resist climbing onto the ridge pole after the raising

Skethcy traversing on the ridge pole

Doug and Nancy locate the metal brackets on which the posts rest

Doug and Nancy locate the metal brackets on which the posts rest

Doug and Nancy prep the floor section before it is raised into position

Doug working with a clamp during the raising

Doug cuts a dowel to length

The crane operator directing traffic

Doug preps beams for the crane

Practiced hands perform the delicate work of moving timbers into place

Practiced hands perform the delicate work of moving timbers into place

Cutting dowels to length

More trimming of dowels

Drills sit idle

Preparing a large section of the timber frame for lifting by the crane

The timber frame without the rafters and ridge pole

Framing on the mezzanine floor

Section of the mezzanine floor before it was moved into place with the crane

The crew prepares to receive the ridge pole

Various bents ready to be raised

The timber frame, about 1/3 completed

The first large bents has just been moved into position

The completed timber frame is surrounded by stick-built 2x6 walls

Steve and Doug preparing for the first large bent

Porch posts partially completed

Front porch framing as seen from the front door

The completed front porch -- 2x4 T&G white cedar floor, 2x6 T&G white cedar ceiling, cedar posts, and pine timber framing

Completed front porch, seen from the west

Completed front porch; the yellow wire is for a hanging lantern

Completed front porch, seen from the east

Front porch posts temporarily held in place

Front porch, incomplete, left side

Completed front porch seen from the north with the large columns resting on boulders moved from elsewhere on the property

Front porch seen from the front (north)

Front porch seen from the west; there is a hole where the chinney will soon appear through the roof

Another view of the front porch from the west

View showing the ceiling of the front porch

Front porch posts demonstrating the careful scribing where the posts meet the rock

Crew members prepare the floor section to be raised into position

Amstutz's shop with Jack making a phone call while Calvin works

Jim and Lucie during the raising

Jim and Tommy watch the frame raising

Jim holds up a brace -- one of the few jobs I could do

Jim does nothing, waiting orders

Jim connects the strapping to the crane

Jim spots the post as it's moved across the site

Jim positions a post onto a metal plate on the foundation

A post is positioned, making sure that the brace and horizontal member are fit at the same time

Jim prepares the straps for lifting a member

Jim helping out from the heights

Moving about the timber frame is easy for climbers

Jim tries to be helpful, but probably is getting in the way

Trimming a dowel to the correct length

Pounding a dowel into place to hold a joint together

Joe and Tommy climb around on the completed frame

The "climbers" help position the scaffolding

Kevin holds a brace in position while a post is slid into position

Kevin clamps a strongback onto a joint to provide lateral strength during lifting

The crew getting started with the raising; Steve is dealing with an issue where the iron rods in the foundation are mispositioned

Carpenter's level

Four strong backs are required to move a rafter subsection

Continuing to move the rafter subsection, Doug comes to help

Continuing to move the rafter subsection, Doug helps, Jou and Doug watch

The very first frame subsection raised into postion -- the king posts around the front door

A bucket of comealongs

A bucket of tension straps

Lucie and Jim on raising day -- all done

Lunch on raising day

A mallet

A mallet and chisel

Tools lay about on the site

Killer drills

Mike positions a post with a spline

Mike measures something

Mike installs a temporary shim

A minor ridge pole is lowers into position

Mike gets aggressive with the orange mallet

The tenon slides into position in its mortise

Steve and Jim move rafters around

Nancy planes the end of a post

Doug guides a horizontal member into place onto a spline

A large subsection of rafters is lifted by crane and positioned around the chimney opening

Richard and Tom guide the rafters into position

The first ridge pole is moved into position

The first bent is moved into position

A post flies through space

Bits of the timber frame are assembled on the ground before being raised

Setting up the straps and comealong in order to pull together the two bents

Doug coats the end grain of a post with preservative

Raising the final bent

The final bent, a little higher

The final bent now flies through the air

The final bent is lowered into position

The finished frame

A closeup of the raising crew

Another view of the finished frame and crew

The red oak used in our timber frame, just after delivery from Rhode Island

Raw material in the Amstutz shop

Richard attaches a comealong to pull sections of the frame together

Pile of sawdust generated during the raising

Amstutz's heavy-duty sawhorses

Closeup of the scribe work of the left porch post

Scribe work of the left porch post

The front ridge pole is positioned in place

Another view of the front ridge pole being installed

All hands on deck for the second ridge pole

Securing the second bent

The stairwell; no stairs yet, as this is one of the last things to be installed

Steve cleans the debris from a mortise

Monir adjustments are made to a tenon to ensure a proper fit

Steve uses a small tractor to move timbers around his yard and shop

Joe and Steve prepare the rafter subsections that surround the chimney

Steve and Mike oversee the movement of member

Steve and Mike slide the roof truss together

Steve inspects a mortise before fitting together the mating members

The crane ball is moved into position by Steve

Steve uses superhuman strength to casually move a 300 pound post; Kevin looks on in awe

Steve does his thing

Steve positions a brace as a complicated joint comes together

Just before the joint comes together

Steve hands something up to Jim

Steve straps and Kevin clamps -- preparing to move a section of timber frame with the crane

Steve applies straps to a frame section to move with the crane

Straps on frame bits

Timber frame bits in Steve's shop

Braces in Amstutz's shop

Lots of timber frame bits await installation

More timber frame bits

More timber frame bits

The entire Hut frame, sitting in storage awaiting installation

The timber frame is partially built on the ground prior to the raising

The timber frame is partially built on the ground prior to the raising; Lucie sits in the middle

Tommy working during the raising

Taking a break from the action

Working during the raising

A small hand-made toolbox

Signaling the crane operator to lift using non-standard signals

Giant mallets

Cherry log, just after being dropped; a fine specimen

Beginning a cut on a virgin maple log

Partway through a cut on a virgin maple log

Once the log is squared, many planks can be quickly cut

Beginning a cut on a cherry log

Closeup of the band saw blade cutting a maple log

Another view of Dan on his portable band mill, Doug in the background

Erin and Zack watch the band mill

Erin and Zack skid an enormous cherry log

Erin and Dan discuss the ongoing milling operation

Arty shot of a stack of maple with the stickers running horizontally

The staging area for milling operations -- the barn. Snow is removed to make way for more skidding

Frozen maple logs waiting to be milled

Maple logs look good -- no rot in the middle

Lots of maple logs in the skidding area

Maple board drying in the barn; drying racks are built from ropes run across the width of the barn

Hundreds of boards are dried at a time

Lucie working hard on preparing the maple

The finished maple ceiling; we're very excited to see our maple in use

The finished maple ceiling; the strings are to locate the chimney

Another shot of the maple ceiling and red oak timber frame

A pile of rough-sawn maple stacked in the barn during milling

A pile of 12 foot rough-sawn maple

Erin and his son Zack move a large maple log onto the portable band mill

A large tarp was erected to allow spraying of the maple board in the rain

Another view of the spraying tent

Zack skids a beautiful cherry log down the road